How to Set Up Outgoing Mail Servers in Odoo 18
Technical Guide
Odoo 18 includes powerful tools for managing emails, making it easier for businesses to handle communication directly from the system. By setting up outgoing mail servers, users can send emails right from Odoo. Setting up incoming mail servers allows Odoo to receive emails and automatically create related records—like leads, support tickets, or tasks.
This tutorial walks you through configuring outgoing mail servers to ensure secure and efficient email handling within Odoo.
Step 1: Turn On Developer Mode
Mail server configuration is considered an advanced feature and requires Developer Mode to access the necessary options under the Technical settings.
How to Enable Developer Mode:
- Go to the Settings module from the main dashboard.
- Scroll down to the bottom of the page.
- Click "Activate Developer Mode" to unlock advanced technical feature
Step 2: Set Up Outgoing Mail Servers
- Outgoing mail servers enable Odoo to send emails directly from the system—for things like order confirmations, invoices, or marketing campaigns.
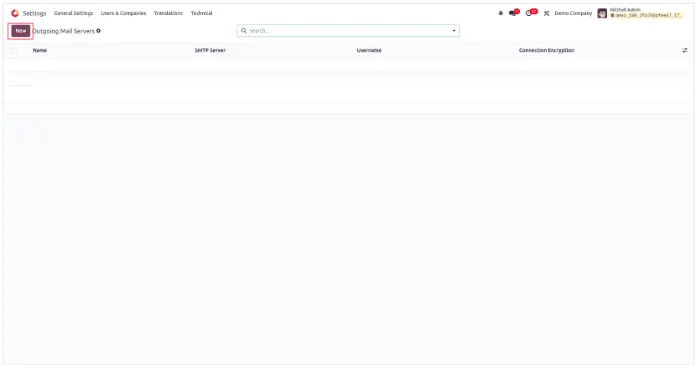
- How to Access Outgoing Mail Server Configuration:
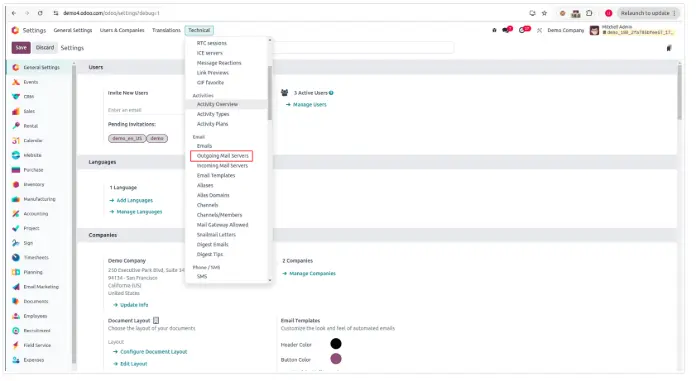
- From the main menu, go to Settings > Technical > Email > Outgoing Mail Servers.
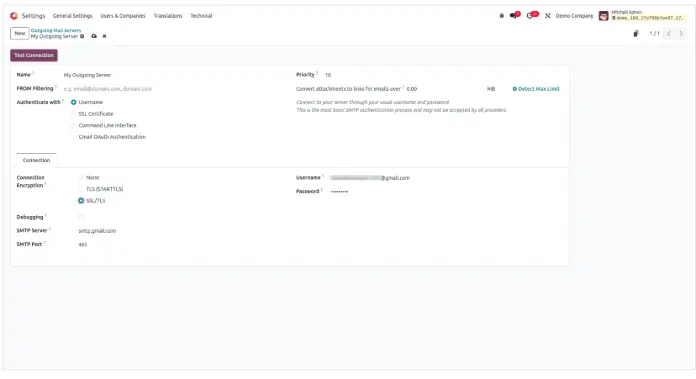
- Once you’re in the form view, fill out the following fields:
- Name – Enter a recognizable label for this setup, such as “Gmail SMTP” or “Company Email Server”.
-
SMTP Server – Input the SMTP address provided by your email provider:
- Gmail: smtp.gmail.com
- Outlook: smtp.office365.com
- Yahoo: smtp.mail.yahoo.com
-
SMTP Port – Choose the correct port number based on the encryption method:
- Use 465 for SSL/TLS
- Use 587 for STARTTLS
-
Connection Encryption – Select the type of encryption to secure the connection.
- SSL/TLS is generally recommended for better security.
- Authentication Method – Choose Username as the login method.
- Username – Enter your complete email address (e.g., you@example.com).
- Password – Provide the password for this account. For providers like Gmail, you may need an app-specific password instead of your usual login.
- Priority – Set a numeric value for priority. Lower numbers mean higher priority when Odoo selects a mail server to use.
- Testing the Configuration:
- After completing the setup, click on Test Connection.
- If everything is set up correctly, you’ll see a success message confirming that Odoo can now send emails through this server.